Setup and Installation
Table of Contents
- Requirements
- MacOS Installation
- Windows Installation
- Windows Installation (MinGW + Gtk)
- Linux Installation
- Building and Running the examples
- Building Outside the Project
Requirements
Here are the basic requirements and dependencies that you need to satisfy in order to use the library:
- A C++17 compiler
- Git
- CMake 3.9.6 or higher
- Cairo
- fontconfig
- freetype2 (Windows and Linux only).
Additionally, the following libraries are dragged as submodules:
Infra provides some basic groundwork common to Cycfi libraries, including Elements.
C++17
Elements currently supports the MacOS, Windows and Linux. In the Mac, we support the XCode IDE. Elements is tested with XCode 10 and XCode 11.
In Windows, we support Windows 10 with Visual Studio 2019, although it will probably also work with older versions of the Visual Studio IDE. In Linux, we support both Clang and g++. Get the latest version with a C++17 compiler.
The CLion IDE is supported on all platforms, it simply requires the CMakeLists.txt file to open and build the project.
Git
Elements C++ GUI library, plus the Cycfi Infra library:
git clone --recurse-submodules https://github.com/cycfi/elements.git
CMake
Make sure you have CMake 3.9.6 or higher. Follow the installation procedure for your platform, or follow the instructions below for specific environments. The project can be built either with the platform specific tool or using CMake with the command
cmake --build . --config Release
Required Libraries
Elements requires Cairo 1.16 or higher, fontconfig and freetype2 (on Windows and Linux). Specific instructions are provided below for specific environments.
MacOS
Install required libraries
This by using Homebrew:
brew install cairo
brew install fontconfig
Install CMake
brew install cmake
Generating the Project using CMake
There are multiple ways to generate a project file using CMake depending on your platform and desired IDE, but here are some examples for the MacOS:
Using XCode
- CD to the elements library.
- Make a build directory inside the elements directory.
- CD to the build directory.
- invoke cmake.
cd elements
mkdir build
cd build
cmake -GXcode ../
If successful, CMake will generate an XCode project in the build directory. Open the project file elements.xcodeproj and build all. You should see a couple of example applications.
Windows
Install required libraries
The Windows port comes with the cairo, fontconfig and freetype2 binaries as
part of the installation in the lib/external directory, so there is no need
to have these libraries installed. CMake will take care of the dependencies.
Install CMake
Follow the installation procedure.
Generating the Project using CMake
Assuming you have Visual Studio 2019 installed.
You want NMake approach if you prefer make-style commandline tool, or
Visual Studio 2019 GUI approach otherwise.
Visual Studio 2019 GUI
- CD to the elements library.
- Make a build directory inside the elements directory.
- CD to the build directory.
- invoke cmake.
cd elements
mkdir build
cd build
cmake -G"Visual Studio 16 2019" ..//
If successful, cmake will generate a Visual Studio solution in the build directory. Open the project file elements.sln and build all. You should see a couple of example applications.
NMake
- Open a Command Prompt for VS 2019 ({x64/x86-64} {Native/Cross} Tools Command Prompt for VS 2019) in your start menu.
- CD to the elements library.
- Make a build directory inside the elements directory.
- CD to the build directory.
- invoke cmake.
cd elements
mkdir build
cd build
cmake -G"NMake Makefiles" ..//
If successful, cmake will generate NMake Make files in the build directory.
Invoke nmake to build the binary.
Windows (MinGW + Gtk)
Install MSYS2 toolchain and required libraries
MSYS2 is a software distro and building platform for Windows
Download MSYS2 from its official website and install it. Its installation guide is on the home page.
Open MSYS2 MinGW 64-bit or MSYS2 MinGW 32-bit from your start menu.
Install tools and libraries:
pacman -S ${MINGW_PACKAGE_PREFIX}-toolchain
pacman -S ${MINGW_PACKAGE_PREFIX}-cairo
pacman -S ${MINGW_PACKAGE_PREFIX}-gtk3
pacman -S make
Install CMake
pacman -S ${MINGW_PACKAGE_PREFIX}-cmake
Generating the Project using CMake
There are multiple ways to generate a project file using CMake depending on your platform and desired IDE, but here are some examples for MSYS2:
Using UNIX makefiles
- CD to the elements library.
- Make a build directory inside the elements directory.
- CD to the build directory.
- invoke cmake.
-DELEMENTS_HOST_UI_LIBRARY=gtktells cmake to build with Gtk.
cd elements
mkdir build
cd build
cmake ../ -G "Unix Makefiles" -DELEMENTS_HOST_UI_LIBRARY=gtk
If successful, cmake will generate Unix Make files in the build directory.
Linux
Install required libraries
In addition to the requirements listed in the requirements section, the GTK3 library is also required by the Linux port of Elements.
On Debian and derived distributions using apt-get (requires sudo):
sudo apt-get install libcairo2-dev
sudo apt-get install libgtk-3-dev
sudo apt-get install libboost-all-dev
Install CMake
sudo apt-get -y install cmake
Generating the Project using CMake
There are multiple ways to generate a project file using CMake depending on your platform and desired IDE, but here are some examples for Linux:
Using UNIX makefiles
- CD to the elements library.
- Make a build directory inside the elements directory.
- CD to the build directory.
- invoke cmake.
cd elements
mkdir build
cd build
cmake -G "Unix Makefiles" ../
If successful, cmake will generate Unix Make files in the build directory.
Building and Running the examples
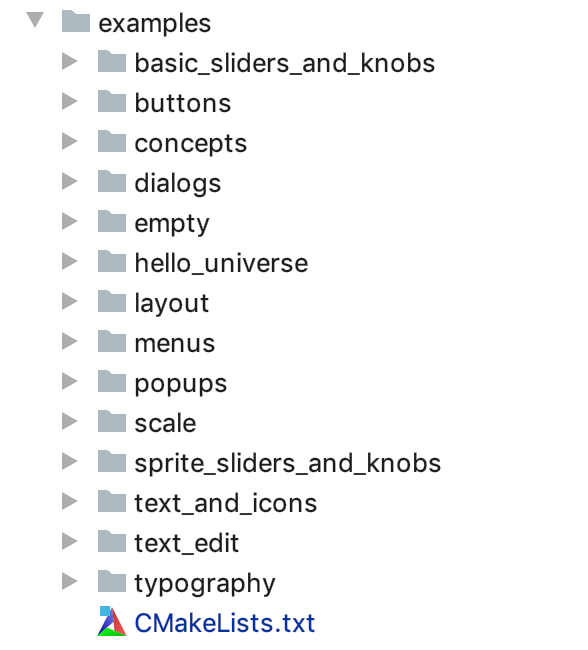
CLion Project Tool Window
If successful, cmake will generate a project file or makefiles in the build directory. Build the library and example programs using the generated makefiles or open the project file using your IDE and build all.
You should see a couple of example applications in there that you can run.
These examples are provided as starting points to get you up to speed in
learning how to use the library. For simplicity, each example is contained in
a single main.cpp source file.
Feel free to inspect and mess with the examples. Each example demonstrates different aspects of the Elements library, from layout to control. You’d probably want to start with the “hello_universe” example, which is the Element’s hello-world counterpart. You can copy the “empty” example and use it as a boilerplate for your own project. See next section on how to copy an example and build outside the Elements project directory.
Tips:
- Resize the window and see the elements fluidly resize
- Use two-finger swipe to move the sliders and knobs
Building Outside the Project
The Elements project is set up so that you can easily copy and paste any of the examples outside the project, set -DELEMENTS_ROOT=”path/to/elements”, and the example should immediately build without any hassle.
Here’s an example assuming the elements lib is in the same directory alongside the “hello_universe” example directory you copied to:
- Copy the hello_universe example project directory.
- Make a build directory inside the hello_universe directory.
- CD to the build directory.
- cmake -GXcode -DELEMENTS_ROOT=”../elements” ../
Copyright (c) 2014-2020 Joel de Guzman. All rights reserved. Distributed under the MIT License